Showing posts with label stacker beads. Show all posts

Monday, November 6, 2017

Cleaning House on Etsy

In an effort to whittle down my stock in my Etsy store, I am offering 60% off everything listed through December 3, 2017.  Any purchases of $20 or more will automatically be reduced 60%.  Shipping is still free.  No coupon codes.  No need to join Etsy to buy.  If the final purchase total is $50 or more, I will include a free gift worth $15 or more.  It really couldn't get any easier!

Below are a few examples of the math.  There are lots of items under $20 that also qualify...you just need to buy enough to equal $20 or more at regular price.  To purchase or check out the details of each, just click on the picture.  If you have any questions, please contact me through Etsy.

https://www.etsy.com/listing/94657127/urchin-bead-embroidered-necklace
Urchin-Bead Embroidered Necklace     Regular price: $225  Sale price: $90


https://www.etsy.com/listing/258977770/22-stacker-supreme-polymer-clay-beaded
Super Stacker Bead Necklace-Polymer Clay    Regular price: $150  Sale price: $60


https://www.etsy.com/listing/534844401/dont-spill-your-pills-seed-bead
Bead embroidery--"Don't Spill Your Pills"    Regular price: $85    Sale price: $34


https://www.etsy.com/listing/550455231/rusted-amoeba-fabric-hand-dyed-100
Rusted Cotton Fabric    Regular price: $28    Sale price: $11.20


https://www.etsy.com/listing/258975516/18-stacker-supreme-polymer-clay-beaded
Stacker Supreme Necklace     Regular price: $75  Sale price: $30


https://www.etsy.com/listing/271715330/ellipse-bead-embroidered-pendant
Ellipse-Bead Embroidered Pendant    Regular price: $30    Sale price: $12


Wednesday, January 25, 2017

Polymer Clay Classes are Back!

  Polymer clay has become a powerhouse of opportunities for people to express themselves.  It can behave as clay, fabric, paint, and more.  The scope of possibilities can be seen on any bookstore shelf that has more than 5 books on the shelf dedicated to it.  It is accessible to the home hobbyist and super-star artists whose work is found in museums.  Just like any art technique, it is best to start at the bottom and work your way up if you are starting from scratch.  Building a foundation of steps will afford you an arsenal of skills that you can have at your disposal when you decide to create something new.

  The year 1995 was the start of a 20+ year love affair with polymer clay. It became my sole expression of choice.  The clay satisfied any mood I felt or wanted to create in a piece of jewelry, set of unique buttons or small art pieces.  I created my company Ovenfried Beads, and my "claim to fame" was the Stacker Bead.  The volume of Stacker Beads that I made allowed a full and long-lasting line of jewelry that found popularity locally and around the world.  Mokume Gane, surface textures and stamps, and other experimental techniques that have no name are my favorite techniques.  Combining polymer clay pieces with bead embroidery, like here and here, is an extremely fun way to make your clay work pop. The multi-media possibilities are endless.  Just check out the book 400 Polymer Clay Designs and let your mind be blown~!

  Now I am again offering my popular private polymer clay classes for adolescents and adults in the Greater Cincinnati Tri-State area.  My classes are a LOT of fun, but I take them very seriously and want to offer the best instruction. 

Beads made from cane slices from class.

Basic Cane Building   -   Students will learn how to layer different colors of clay to create a cane or loaf, that when sliced, will reveal the same pattern per slice.  (Think of sushi.)  Four layering techniques will be taught, then if time allows, students will be able to experiment.  Use of pasta machine and long blade and piercing tool.  

Go crazy with color or monochromatic for a more subdued effect.


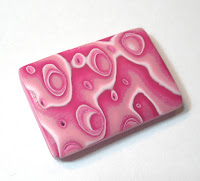
Mokume Gane   -   Mokume Gane is my favorite technique, achieved by layering several contrasting colors of clay into a brick, distorting with piercing tools, and slicing to reveal elegant wood-grain-like organic patterns.  Each slice is different.  Use of pasta machine, long blade, variety of piercing tools.


Extruder Cane Fun  -   Clay extruders provide a way to create small detailed canes.  When the right color combinations are used, eye-popping designs result.  This class will focus on the grid design you see here.  Use of clay extruder and sharp blade.


Commercial and hand-made stamps used in these leaves.

Texture with Pearl Surface   -   Choose commercial stamps, hand-carved stamps and textures from unexpected places.  Add some pearl powder to give a jewel-toned sheen and accentuate the surface shapes.  Use of pasta machine, long blade, stamps and texture tools, a variety of shaped cutters, pearl powder and polyurethane coating.


Stacker Beads   -   Stacker Beads look tough to make, but the technique is simple.  With practice you can make your own Stacker Beads and WOW your friends!  You will create both beads feature above.  All you need is your hands and a long blade. 

   Fine print: 
There is no supply list to purchase, as the class fee covers the clay and use of my large selection of tools acquired over the years.  If a student has clay and tools they previously purchased, it is fine to incorporate them into the class, but the class fee remains the same.  You can come to my beautiful home on the West side of Cincinnati or I can come to you.  If I come to you, I will have some space and electric plug requirements, and I only teach in non-smoking environments.  Very young children and rowdy pets are distractions that will slow the process and diminish your experience, so plan accordingly.  Good dexterity is necessary in both hands.  Students keep all of their creations...including beads, buttons, pendants...whatever the student makes. Basic jewelry construction is not covered, but can be a separate class if desired.  I prefer to keep class sizes 1-4.  Cost:  $65 per 4 hour session or $75 per 5 hour session,  per student, ages 10 and up.  The class categories above cannot be combined in one class, but multiple sessions can be scheduled if one desires to learn more than one technique. 

To see more of my current work and stay tuned to what is happening, follow my AmyEclectic page on Facebook or AmyEclectic on Etsy.  Interested in scheduling a class?  Contact me here

Tuesday, July 1, 2014

The Stacker Bead Destash

Today I posted 4 listings on Etsy for the beginning of my bead destash.  These beads are from my original jewelry supply stash.  If you click on each picture, you will be taken to the individual Etsy listing.  These listings contain the majority of my current Stacker bead stash.  When they're gone, they're gone!   Make sure you also check out my new Rusty Fabric panels that are now available for purchase.  They are hand-dyed, one-of-a-kind, and ready to be used! 

Excellent set of beads...creme of the crop!

 
Great fall jewelry colors.
https://www.etsy.com/listing/195918486/96-polymer-clay-stacker-beads-destash?ref=listing-shop-header-0
 This was added 7/10 due to popular demand.
 
This massive lot of 148 beads has a ton of potential.


Monday, January 28, 2013

New 2013 Work and New Blog

Hello friends and fans!

   2013 started with a terrible creative slump.  The cold dark days and holiday recovery just really got the best of me.  I toyed with the idea of just scrapping Ovenfried Beads altogether.  Honestly, I didn't think that I'd ever really be moved by polymer clay again. 

   Then I installed some lights in my new basement studio.  This Thomas doubts no more that there has to be an endless spring of creativity that just ebbs and flows.  Sometimes it's a torrential rush that turns into compulsive creation....and sometimes it trickles so slow that it seems like adding something to mashed potatoes is a genius idea. 

   I've been digging out beads that were packed up for moving.  A trip to the craft store resulted in some new findings that I've been needing for a while.  Classical music on public radio, even during the winter fundraising, set the mood.

   SO, as I posted on my Facebook page this morning, my big liquidation sale ends Wednesday.  I have new work to post, so if you happen to read this before January 30, get your behind over to my Etsy store and save a boatload on everything you like there.  Don't forget to enter the promo code!  If you forget, you will pay full price.  I just really don't have time to cancel transactions, relist and have someone re-buy them so that they can get the sale price.

   Wednesday night I will be putting it all back to regular price so I can freshen it up with new work.  These photos are items that will be available for sale.  (After they're posted I plan on linking them to the actual ad. If I remember.)

OH, and by the way....just one more thing to tell you.  I have a new blog that has absolutely NOTHING to do with Ovenfried Beads or my handcrafted art.  Photography is another one of my hobbies, so if you like neat pictures of nature and urban stuff (lots of closeups), just hop on over to my new photo blog: A Very Pedestrian Snail.  It's pretty much just all photos.


Thursday, May 10, 2012

30 turns into 40


Today I increased my whole-store sale discount to 40%, through May 18.  Coupon code is "MOM40".  This discount applies to everything in my store, including these amazing brand new earrings that I just made the other day.  (Regular price is $65...can be yours for $39!)
There is an Etsy shop event today protesting Etsy's allowance of mass-produced items being sold as handmade.  Although I completely agree that Etsy should maintain it's insistence that items be handmade by the shop owner (except, of course, in the instance of vintage and supplies), I need to be open.

More information about the protest and the reasons behind it can be read here.

Thursday, May 12, 2011

Other People's Stacker Beads.....Part 6


(Note: There is an issue with some formatting today, so I cannot present direct links through my text or make the end of it look particularly easy-to-read. Just check out my Etsy shop, which is listed on the sidebar, if you want to get a tutorial of your own.)

So my Stacker Tutorials have been selling like crazy, but I've been getting very few responses as far as follow-up photos by buyers. I suppose some folks just don't want to send pix for whatever reason and that's okay. Some may be taking their time to perfect it before they send them, and that's fine.
Well last week I received photos from a buyer who had received the tutorial less than a week prior. I thought I was looking at my own Stacker beads! I looked at them and marveled at how well she fine-tuned the technique in such a short amount of time.


This "she" I'm talking about is Marty McGraw, of Indiana. She says, "I sell my finished jewelry at Of Switzerland County in Vevay, Indiana (www.vevayin.com), The Artisan Gallery in Madison, IN, Shoppe on Main in Warsaw, KY, Arts-a-Poppin' in Indianapolis, and The Enchanted Sleigh in Centerville, IN. I used to have an Etsy shop, but it's currently not open. I don't have a very impressive web presence!" She may not have much of a web presence, but she does get her stuff OUT THERE where people can touch and feel and see it in person.

There are a couple of things that she demonstrates in the photos that is something I point out in Step 3. If you switch around the order of the 5 colors that you choose, you will get different beads. She also had some great feedback about some other steps. If you don't have the tutorial, these steps will mean nothing, but if you decide to get it, refer back to this.
~ In step 6, pretend the stripes in the ball are going from left to right, 90 degrees compared to the picture in step 5. That is the position that you will roll the ball so that you get the great long striped cone in Step 7.
~ After you cut and created 2 stacker beads, go back and continue step 6-8 with the remaining fat end of the cone. You will get more stacker beads that way. Any small scraps can be rolled into tiny balls to complement the rest, as Marty demonstrated in the second photo.
Thank you VERY much Marty for sending me your pictures and feedback! (And for the excellent feedback! I hope to edit the directions once my current stack of printed tutorials is sold out)
Right now my tutorial is on sale....as of posting this blog, I have 6 left at 20% off!

Wednesday, November 3, 2010

Stacker Bead Tutorial now for sale


Hello there!

It's been a wild fall. Lots of crazy things on the personal, professional and spiritual fronts. Sorry I'm not so good at keeping up with this. I've spent the majority of my time working the day job, and filling in the rest of it getting amazing new work made for a big show I'm doing this Saturday in Cincinnati, in Clifton.

Anywhoo, I received many emails from folks seeking a tutorial on my Stacker beads. I responded by having one created by my good friend Aimee, a great artist and designer. Though the layout is simple, it explains how to make the beads, with photos that go with each written step.

I have opted to have it printed on real paper rather than just email a PDF, because I am including a couple of Stacker beads with the tutorial so you can have one in hand to study and hold in person. Any kind of craft like this is so tactile, and just emailing a file didn't seem like I was offering enough for the money. I want you to get a fun package in the mail and not just another bill!

The tutorial is $15, and it includes the printed steps, the beads, and the cost of shipping for customers in the US and Canada. International customers will pay $1 for shipping....which is less than it will actually cost, but will help defray some of my costs as well.

I am selling it through Etsy, though you are free to contact me if you want to order one directly. I accept Paypal, which you can use with your credit card or a check without joining. The tutorial is an affordable alternative to taking my class on the subject, especially for folks who can't get to Cincinnati!
Thanks for checking it out...

Wednesday, August 4, 2010

New Stacker Jewelry!


It's been forever since I made Stacker necklaces and bracelets. This summer has been so stinkin' hot that even the thought of trying to roll them out is enough to make me go jump in a lake. BUT I enjoyed some fan-nage and cold water and whipped up these pieces yesterday....and posted them on Etsy.

This summer is starting to bum me out, because I have stacks of ideas of things to do...new tools....and more Stacker beads, now that I used a bunch of 'em up!

Thanks to Cynthia for posting my chevron beads on Polymer Clay Daily today. It's always a great surprise to be on there.
Tuesday, September 1, 2009

Other People's Stacker Beads .. Part 5


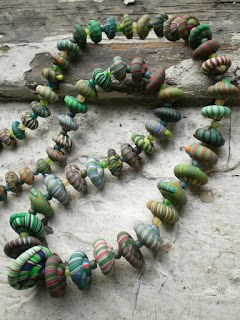
Yesterday I received an email from Maika Martinez from Pamplona, Spain. She has been making Stacker beads, and I must say that she's doing just great! One thing I really like about her Stackers is her use of white. All except 4 of them have large doses of white or very light yellow. The "multiple effect" is great. They look good enough to eat!

Maika's Flickr page has lots of great work. She likes to experiment with different techniques, and she does them well. She is also a member of the APE, a.k.a. Association of Polymer clay of Spain.

Thanks Maika for sharing your version of the Stacker bead.

I invite more folks to show me theirs. If you want to give it a try, visit this page.

If you go to my archives from May and April, you'll see others who have done the same!

Monday, July 13, 2009

Polymer Clay Class 2009...the out-of-towners!

These are my new friends! All 4 drove from pretty far away from Cincinnati .... 3 from the east coast, and one from Texas! Here they are, having fun making beads.


Ok guys, here is how you make Stacker beads. Cut a thin slice fom 5 different colors of clay, right off of the brick. Stack them on top of each other, cut that stack in half and then stack the two half-stacks on top of each other. Got that??


Roll the cube of stripes into a ball, then begin to roll it so that you create a striped cone. Remember, don't roll it back-and-forth...just in one direction. You want it to be kind of like a cone-shaped barber shop pole.


Determine a good place to cut the striped cone. This spot looks pretty good!


After you cut the cone down the center from the point to the fat end, start to coil it onto itself, kind of like a snail shell, except the fat end is in the middle instead of the tiny end. This keeps the beads solid and strong.


Before you know it, you'll have a tray chock-full of Stacker beads, ready to be drilled! These gals were Stacker bead experts in just a matter of a couple of hours.


Thank you Marie, Leah, Carroll and Helen for coming so far to spend time with me, sightseeing, eating, swimming, beadmaking, laughing, driving, exploring and creating. I hope you can come back to Cincinnati again next year.......... for Part 2~!!

Tuesday, May 19, 2009

Other People's Stacker Beads ... Part 4

Margit Böhmer, from Gera (Thuringia), made these Stacker beads months ago. She contacted me about them, and when I saw this picture I remembered that it was probably the first Stackers I saw after publishing my simple tutorial. After a little tour of her Flickr page, I feel so inept in my variety of techniques. Margit is one of those clayers who can do so many things so well, probably partly because she's a member of the same German guild as the others I've featured here so far. I'm particularly attracted to her African-inspired beads (or should I say as-close-to-African-beads-as-one-can-get). The store where I work, St Theresa Textile Trove in Cincinnati, has many of these beads (but are not featured online...sorry!), so I can attest to their accuracy not only in design, but how they're strung.

Thank you Margit for contacting me! If there wasn't an ocean between us, we'd be claying together for sure! There must be something in that European water.

Friday, May 15, 2009

Other People's Stacker Beads...Part 3

Greti Botka made this lovely bracelet out of her Stacker beads. I just love this photo. What a clever background. Greti is from Austria and is also a member of the German Guild, like the other featured Stacker bead makers. To see more of Greti's work, visit her Flickr page.

I decided to stop using tags or labels for my blogs. The program wants to plug in words I don't want to use. Example, suppose I want to use "Art" as a tag. When I write in "Art", the word "Art Beads automatically fills in and can't be edited. If you know a way around this, please let me know.

Wednesday, May 13, 2009

Other People's Stacker Beads...Part 2


Today I got a great email blog post from Polymer Clay Daily which seems to fit perfectly with my coverage of Stacker beads made by other people.

Listen to this:

"Nothing is original. Steal from anywhere that resonates with inspiration or fuels your imagination. Devour old films, new films, music, books, paintings, photographs, poems, dreams, random conversations, architecture, bridges, street signs, trees, clouds, bodies of water, light and shadows. Select only things to steal from that speak directly to your soul. If you do this, your work (and theft) will be authentic.

Authenticity is invaluable; originality is non-existent. And don’t bother concealing your thievery - celebrate it if you feel like it. In any case, always remember what Jean-Luc Godard said: “It’s not where you take things from - it’s where you take them to."
- Jim Jarmusch


The Stacker beads above are from PetraTornack-Zimmermann from Germany. She is a member of the German Clayguild. Her Flicker site has lots of great photos of her polymer clay, clothing and ATC's. Her Stacker beads look eerily like mine....but I'm so glad because there's no way I could provide Germany with all the Stacker beads they need! Clearly she didn't "steal" my idea...nor did I come up with it myself. It was a combination of timing, circumstance and past information all rolled (literally) into one technique.

Tuesday, May 12, 2009

Other People's Stacker Beads...Pt 1

Shortly after I posted a free tutorial on how to make Stacker beads on my website, photographs started popping up here and there on Flickr. Once I saw a couple different people do it, I decided to feature their own Stacker beads, just to illustrate how we all can take something that's a fairly precise method and make it our own.


The above Stacker beads are from Gaby Birrer of Switzerland. I think her photo here was the first bunch of Stackers I'd seen that weren't mine. Don't they look just good enough to eat? I think they look like chewy fruit flavored candies. Perhaps it's time for me to go make breakfast!

She also does some great extruded beads that get me pretty excited.

If you too decide to make Stacker beads, or have already done so, let me know! Just send me your name, where you're from, your websites (up to 3...like Flickr, Etsy, your own, etc) and a JPEG image of your Stacker beads. I will let you know when I feature you.

Monday, April 27, 2009

Newest finished pieces

This fish is not a funcional 'thing' right now....just has a backing that looks like water. I could attach a barrette finding or hanging apparatus on it, but I think I'll wait . One of my BIG DREAMS is to create a whole school of these embroidered fish. How many lifetimes would that take? Probably just this one, if I stopped making everything else. BTW all of my fish eyes are a single Stacker bead. You can buy it from my Etsy store. Check out my links on the left for the link.

Newest Stacker bead necklace. When I was sick a couple weeks ago I went nuts making Stacker beads. I have to make a few hundred of them to have a quality selection to choose from. Not all Stacker beads are great, but I do pick the best ones for the powerful pieces like these. It's for sale in my Etsy shop. If you would like a shot to make your own, visit this page.

Combining my polymer clay focal pieces with seed bead embroidery is one of my favorite challenges. The two just seem to go hand-in-hand. This brooch is also for sale. Mokume gane is my favorite polymer clay technique. It takes practice to know when your loaf is gonna look good or look like shit when you slice it. Some clayers just take all their scraps, slice off a chunk and call it mokume gane. But no....it's a bit more refined.